Wednesday, June 5, 2013

How to Tell Your Shampoo Bottle from Your Conditioner Bottle

Has this ever happened to you? You're in the shower, your hair is wet and your face is wet - you reach for the shampoo bottle and pour some in your hand only to realize it's conditioner! If you're like me, you're trying to open the conditioner bottle to put it back in so it's not wasted, and you're doing this soaking wet in the shower! Most of the shampoo and conditioner bottles sold today are the same shape, same color, and event have the same font - you have to pick it up to see which one you have.

Well, I figured out an easy way to tell them apart without having to read the bottle. Take a brightly colored rubber band, preferably a wide one (actually, any rubber band will do) and place it on one of your bottles, doesn't matter, whichever one you prefer. Now, each time you wash your hair, you won't accidentally pour the wrong one, you'll know the one with the rubber band is either the shampoo or conditioner - whichever one you designated with the rubber band. Easy peasy and no wasting!


Thanks for reading!!


Comments or questions are always welcomed. I would love to hear what you think of this post or any of my other posts. Thanks!

Wednesday, May 15, 2013

How to De-Sugar Crystallized Ginger

Crystallized ginger or candied ginger is widely known for it's healing properties for minor stomach issues.  The process to make crystallized ginger is a multiple step process starting with sugar and ending with more sugar. Most store bought crystallized ginger is always laced with a lot of that extra sugar and instead of tasting the ginger, you get a mouthful of sugar, I have never liked that. I was always blowing off the sugar or wiping off the sugar with the bag it was stored in - that's why last year, I started making my own.

Recently, I started buying it again because making it is a multi-step process and I'm lazy. I decided to try and figure out a way to remove that excess sugar coating without ruining the integrity of the ginger. I tried to boil it and it just got too gummy, I don't know if I boiled it too long, but I didn't like it. I then tried to rinse it under running water, that removed some, but there was still quite a bit of sugar still adhered to it. The next thing I tried was to put the ginger in a jar, add some cold tap water and shake the jar, that didn't do it. Then I thought, what if the water was heated? So I microwaved some water for about 40 seconds and did some jar shaking again and it worked. Now the ginger was "wet", not very palatable, so I Goggled how to dry candied fruit and came up with a great way to get the ginger to how I like it and I want to share this with you.

Along with your ginger, you will need:
a jar with a lid (a mason would be great, then you wouldn't need a glass cup)
a small broiler pan from your toaster oven or a cooling rack set in a cookie sheet
a colander
cooking spray
(optional) a glass measuring cup or something to heat water in the microwave
preheated oven to its lowest setting
timer

Put some water in your mason jar or measuring cup and heat up for about 40 seconds. Place a small handful of ginger in the jar and if using a measuring cup, pour in the heated water - you want the water level to be just below the ginger.


Place the cap on the jar and over the sink, shake up and down vigorously for a couple of seconds - you want to agitate the ginger against each other to remove the sugar.


Pour out the ginger in your colander and repeat the previous steps until all your ginger has been processed. Shake your colander to remove excess water. Dry out the jar.


Spray your broiling pan with cooking spray then spread the ginger in a single layer (my broiling pan has a lip on the bottom, so I turn it upside down, the lip will prevent the ginger from falling off). Place pan in your oven and time for about an hour.


When timer goes off, remove pan from your oven and turn over the ginger (I just use my fingers, you can use tongs or chopsticks) - the underside is still wet. Let it go for another 2-3 hours, set your timer! After 2 hours, check to see how your ginger feels - touch it should be dry with no sugar on it. If it still feels wet, put it back in the oven for another hour or so. When your ginger feels dry, take it out of the oven and cool.


Store the finished ginger in your jar. You could probably store this in your cupboard, but I keep mine in the frig - tastes good when it's cold. I don't know how long it will keep, I seem to buy just enough for the week and I always eat it before the week is over! I took this pic a day after I started writing this and you can see I ate quite a few. My crystallized ginger is very similar to Trader Joe's Uncrystallized Candied Ginger.


So, removing all that excess sugar from store bought crystallized ginger is that easy. Yeah it's a multi-step process, but at least I'm not eating all that extra sugar that my body doesn't need. Give this a try and let me know how you like it or if you do anything different.


Happy Tummy!!

09/25/13 Update: I ensure the ginger is as dry as possible and I now bake each side for approximately 45 minutes each. 


Comments or questions are always welcomed. I would love to hear what you think of this post or any of my other posts. Thanks!

Friday, April 12, 2013

Small Pursellet


A pursellet is a coin purse and wallet combo. This is a small one, designed by me, to carry your folded bills on one side and your cards on the other with your coins in the center. The inside is lined with contrasting fabric and it closes with a zipper. I used a medium weight interfacing in back of the main fabric and lining to give this pursellet some structure. The bottom is squared off which creates a lot of room for everything you need to carry, even the miscellaneous bits of papers we all seem to collect.  

Hand washable, this pursellet can hold it all and is small enough to be carried in a jacket pocket or back pocket of your jeans - great for those times when you don’t want to carry a big bag. 

The approx. dimensions are 6” x 4” with the bottom measuring about 1" wide. 

Here are some recent ones I've made and put up for sale on  Etsy:

Harry Alexander dragon fabric - this is the front.


This is the back.


Hand dyed (by me) fabric.


Floral print.


Hawaiian themed.


Orange dots.


Inside view - empty.


Full - The pockets can hold about 15 cards on each side - the pockets were designed to keep everything separate from each other for easy access. 


I consider the small pursellet my signature piece as I designed it and have been using one for several years now. These are on sale for $15.00. 


I also designed a larger one that can hold unfolded bills - the pockets are designed so you place your cards "head" first instead of the conventional way. This one goes for $18.00:


I have other things for sale as well - bags, water bottle holders, beaded necklaces, herbal product, as well as other useful items. Visit my shop anytime, my doors are always open.

Thanks for reading!!


Comments or questions are always welcomed. I would love to hear what you think of this post or any of my other posts. Thanks!


Thursday, March 7, 2013

Headache Tip


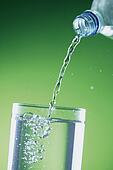
Yesterday I had a bad headache. I've been having neck and shoulder issues for a while now and I was sure my pain was related to that. I was wrong. After being in pain for a couple of hours, I remembered the wise words of my daughter Dawn, "Mom, when you get a headache - drink water. A headache is a signal to your brain that you are dehydrated". I immediately downed a glass and a half of water and waited about 30 minutes and my headache was gone. Some of my neck and shoulder pain was eased and I wasn't hearing any crinkling from those joints - the water lubricated those joints.

When a lot of people get a headache, they immediately reach for the  pill bottle - they don't think about dehydration. In today's world of being on the go and eating fast foods, a lot of us reach for sodas or energy drinks to quench our thirst and don't think about drinking water. Drinking sodas or energy drinks can contribute to headaches because of the sugar and other chemical content that's in those drinks.

I was born and raised in Hawaii, and for all of my adult life there, I drank Diet Pepsi day and night - I hated water, never drank it unless there was nothing else. I know a lot of people who just don't like water. Well I didn't know that the aspartame in the soda, coupled with the Hawaii heat was why I was sick all the time - I was constantly getting headaches. It wasn't until years after moving to Washington State that an email went around talking about diet sodas and aspartame. The email basically said, "Aspartame stored at high temperatures turns into formaldehyde". That sent an immediate signal to my brain that I needed to stop drinking diet sodas, and it was then that I realized that most my headaches I got in Hawaii were from not drinking enough water. I have since stopped drinking sodas - I only indulge in a lemon lime soda when my tummy is upset, and now, I only drink water.

Not only will drinking water keep you hydrated, it can also alleviate a lot of pain by keeping your joints lubricated and it can also curb your hunger. If you don't like water or it tastes bland to you, adding fruits, veggies and herbs can greatly enhance the flavor to make it more appealing. The best way to drink water on the go is to get a BPA free water bottle (sold at most outdoor or big box stores), and filter your water. This will eliminate plastic bottles filling up our landfills.

So the next time you get a headache, reach for a water bottle instead of the pill bottle. How much water should you drink in a day? Go here to figure out how much water you should be drinking based on your weight and answering some other questions. If after drinking water, your head still hurts and you have these symptomscall  your doctor - you need medical attention, something that water cannot help.

Drink Water My Friends!


 Comments or questions are always welcomed. I would love to hear what you think of this post or any of my other posts. Thanks!

Friday, March 1, 2013

Homemade Sausage & Sausage and Egg Cup Recipe


Here is a yummy recipe I made the other night with just sausage, eggs and cheese, it was real easy to put together.

Sausage Recipe

1 lb. ground pork
1 tsp. fennel seeds (I grind mine to powder form for better flavor)
Herbs of choice
1/4 tsp. salt
several grinds of pepper

- In a bowl, place all ingredients and mix.
- Let sit for half hour or so to let flavors marry.
- Use as desired or make some Sausage and Egg Cups.
- To make meatballs - roll into balls and bake at 425 for 25 minutes.


Sausage and Egg Cup Recipe

- Preheat over to 425.
- Using about 3/4 pounds of  homemade or store bought sausage, place a little into a 6 cup muffin tin sprayed with cooking oil. Place muffin tin on a *foil lined rimmed cookie sheet.
- Spread evenly on the bottom and up the sides of each cup, don't make it too thick.
- Crack an egg in each cup and sprinkle with a little salt and pepper.
- I put a good pinch of cheese on top of each egg.
- Bake for 20 minutes or until egg is cooked as desired.
- Serve hot.

I  used just over 3/4 pounds of sausage and had a little leftover, so I made meatballs with the rest. If you use a 12 cup muffin tin, you could probably stretch 1 pound of sausage.

* I did have spillage from the eggs and did not line my cookie sheet - the baked on egg was very hard to remove.


Happy Baking!!


Comments or questions are always welcomed. I would love to hear what you think of this post or any of my other posts. Thanks!