Showing posts with label tips. Show all posts

Thursday, April 3, 2014

Eyeglass Shopping Tip


Next time you go shopping for eyeglasses, don't just rely on the mirrors at the store or your friend's advice. Most of us have a camera readily accessible these days, so whip it out and take a selfie with the proposed glasses you're interested in. This way, you will see you as others will, and you can get a better look at yourself in your new glasses. 

This pic is me in Costco trying on what will be my new glasses. I was by myself and the sales lady just gave me a quick, "Yeah, it's looks great on you". You never know how sincere they are or if they are just doing their job. I think in this case, the sales lady was right. I'm so glad because I tried almost every small eyeglass they had on their wall and this one fit the best. 

So no worries next time you go eyeglass shopping, just bring your camera or whip out your phone and take a selfie with your proposed new glasses.

Another selfie tip: If you ever need to check your face or your teeth (after eating a green salad!) and you don't have a mirror, take a pic of your face - you'll spot any imperfections right away and can take care of it on the spot.

Thanks for reading and SMILE!


Comments or questions are always welcomed. I would love to hear what you think of this post or any of my other posts. Email is the best way to contact me, and please be sure that your email address is sited so I can write you back. Thanks!

Sunday, July 28, 2013

How to Get Your Kitchen Sink to Sparkle


I cleaned my sink yesterday and it was pretty gross, I have a double sink - disposal on one side and a regular side. The drain on the regular side was either not installed properly or is the wrong side - there is a small gap between the sink drain fitting and the sink so a lot of food debris gets caught and if it's not scrubbed, it can get pretty nasty (and smelly!). I had a cut piece of lemon that I used for a recipe and it was sitting in the sink, waiting to be disposed of. Now every time I put large pieces of lemon of any citrus fruit in my disposal, it just tends to roll around with the blades of the disposal doing this dance and it doesn't really break it up like it's supposed to. Don't know if the fruit is too thick or the blades are dull - the disposal really isn't that old.

As I'm starting to clean the sink with little bit of Comet powder cleanser, a toothbrush and a scrubber sponge, I kept looking at that lemon, I was thinking of how nice lemon smells and how lemon is used in a lot of cleaning applications. I instinctively picked up the lemon and started scrubbing the sink with it. I used the edge of the lemon to get under that awful gap between the drain and the sink, and it was doing a pretty good job - I ditched the toothbrush and sponge and just used the lemon. I scrubbed the floor of the sink, the walls, even inside the drain well - and it all smelled so lemony. The oil from the lemon was making the sink shiny and the waste water was turning yellow from the lemon so I knew the lemon was doing its thing (if things are really bad in your sink, you could also sprinkle some salt and use that as an abrasive).


I have a wire trap the sits on top of the drain to prevent large food particles or utensils from going down the drain and that can get pretty nasty too, so I took the lemon and started scrubbing it.


By the time I was done, the lemon was completely spent - it had given me all it had, but, I had one more task for this lemon. The insides were totally loose so I removed it and tore the peel into small pieces and threw them down the disposal and turn on the disposal so that whatever was left of the lemon could deodorize the inside of the disposal.


See, nice and sparkly!!


So, next time you have a cut piece of lemon, or any citrus, don't throw it out - try my new idea and watch your kitchen sink shine!


Happy Scrubbing!!!!


Comments or questions are always welcomed. I would love to hear what you think of this post or any of my other posts. Thanks!

Wednesday, June 5, 2013

How to Tell Your Shampoo Bottle from Your Conditioner Bottle

Has this ever happened to you? You're in the shower, your hair is wet and your face is wet - you reach for the shampoo bottle and pour some in your hand only to realize it's conditioner! If you're like me, you're trying to open the conditioner bottle to put it back in so it's not wasted, and you're doing this soaking wet in the shower! Most of the shampoo and conditioner bottles sold today are the same shape, same color, and event have the same font - you have to pick it up to see which one you have.

Well, I figured out an easy way to tell them apart without having to read the bottle. Take a brightly colored rubber band, preferably a wide one (actually, any rubber band will do) and place it on one of your bottles, doesn't matter, whichever one you prefer. Now, each time you wash your hair, you won't accidentally pour the wrong one, you'll know the one with the rubber band is either the shampoo or conditioner - whichever one you designated with the rubber band. Easy peasy and no wasting!


Thanks for reading!!


Comments or questions are always welcomed. I would love to hear what you think of this post or any of my other posts. Thanks!

Thursday, March 7, 2013

Headache Tip


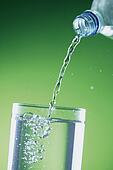
Yesterday I had a bad headache. I've been having neck and shoulder issues for a while now and I was sure my pain was related to that. I was wrong. After being in pain for a couple of hours, I remembered the wise words of my daughter Dawn, "Mom, when you get a headache - drink water. A headache is a signal to your brain that you are dehydrated". I immediately downed a glass and a half of water and waited about 30 minutes and my headache was gone. Some of my neck and shoulder pain was eased and I wasn't hearing any crinkling from those joints - the water lubricated those joints.

When a lot of people get a headache, they immediately reach for the  pill bottle - they don't think about dehydration. In today's world of being on the go and eating fast foods, a lot of us reach for sodas or energy drinks to quench our thirst and don't think about drinking water. Drinking sodas or energy drinks can contribute to headaches because of the sugar and other chemical content that's in those drinks.

I was born and raised in Hawaii, and for all of my adult life there, I drank Diet Pepsi day and night - I hated water, never drank it unless there was nothing else. I know a lot of people who just don't like water. Well I didn't know that the aspartame in the soda, coupled with the Hawaii heat was why I was sick all the time - I was constantly getting headaches. It wasn't until years after moving to Washington State that an email went around talking about diet sodas and aspartame. The email basically said, "Aspartame stored at high temperatures turns into formaldehyde". That sent an immediate signal to my brain that I needed to stop drinking diet sodas, and it was then that I realized that most my headaches I got in Hawaii were from not drinking enough water. I have since stopped drinking sodas - I only indulge in a lemon lime soda when my tummy is upset, and now, I only drink water.

Not only will drinking water keep you hydrated, it can also alleviate a lot of pain by keeping your joints lubricated and it can also curb your hunger. If you don't like water or it tastes bland to you, adding fruits, veggies and herbs can greatly enhance the flavor to make it more appealing. The best way to drink water on the go is to get a BPA free water bottle (sold at most outdoor or big box stores), and filter your water. This will eliminate plastic bottles filling up our landfills.

So the next time you get a headache, reach for a water bottle instead of the pill bottle. How much water should you drink in a day? Go here to figure out how much water you should be drinking based on your weight and answering some other questions. If after drinking water, your head still hurts and you have these symptoms, call  your doctor - you need medical attention, something that water cannot help.

Drink Water My Friends!


 Comments or questions are always welcomed. I would love to hear what you think of this post or any of my other posts. Thanks!

Tuesday, July 10, 2012

Preserving Your Acrylic Ruler

Many crafters have their favorite tools that they use all the time. One of mine is an acrylic ruler, I like this one by Omnigrid - it has measurements down to 1/8", which I use in both sewing and paper crafting. It is because of this 3" wide ruler that I have been able to finally get a grasp on working with fractions (my algebra teacher would be so proud - lol!).


Because I've had this ruler for years and used it all the time, the numbers and lines on the backside (the side that is always on top of the fabric) have worn off (it's only painted on) and the first several 1/8" measurements are gone, which makes it difficult to use.


A while ago, I did buy a new, identical ruler (because I liked this one so much) and I have decided that I want to preserve this ruler so it will last a while, my first ruler has lasted more than 4 years or so. As I was planning to preserve the new ruler, my first ruler broke around the 13" mark, so I cut it off and sanded the edge smooth. 


I took the new ruler and placed the worn ruler face down on top of it - basically, they are face to face. With the new ruler on the bottom, I can see the 1/8" measurement lines and using a sharpie, trace those missing lines.


See the newly drawn lines? (I didn't say they were straight)


Now, to preserve those newly drawn lines and to preserve your new ruler - take some clear packing tape and using the 1 1/2" horizontal measurement line as your guide (half of the ruler), place the edge of your tape on that 1 1/2" line and do the same for the other side - doing it in the center will avoid having a tape line where you don't want it, and will be unnoticeable. There will be an overhang on each side which you can cut off with a craft knife or scissors. You can do this with any size ruler - for the real narrow ones, just use a single piece of tape and place ruler in the center of tape .


Here, the packing tape was placed off center, I figured out how to center the tape after I stuck it on the ruler so if you look close, you can see the tape at the 1-1/4" line from the left side.

My worn out ruler is now back in business and my new ruler is ready for a lot of cutting and measuring. My new ruler should last me a long time - plus, with the tape on the backside, if it should ever crack, it won't separate because of already being taped. How cool is that?

So if the lines on your ruler get worn out, use my simple tips to get it back in action again and if when you should buy a new one, be sure to tape up the back so you can preserve it for many uses.

Happy Cutting!!!

Comments or questions are always welcomed. I would love to hear what you think of this tip or any of my other posts. Thanks!


Thursday, February 2, 2012

How to Close a Bag of Frozen Veggies

Frozen veggies are great to have in your freezer, they come in very handy when you need extra veggies in your meal or if you need to make a quick side dish. The veggies are frozen immediately after picking and processing so you know it's pretty fresh. The problem is tho, that I never use the whole bag at one time and there's always about a half a bag left after taking what I need. Instead of storing the remainder of the bag in a container or another plastic bag, I just store it in its original bag. Here's how I do it:


When you cut the bag open, cut about 1/2" below the top and 1/2 way across the bag. You want to have 1/2 of it still attached - I'm holding the tail. 


After taking what you need, gather and hold the top in your hands.


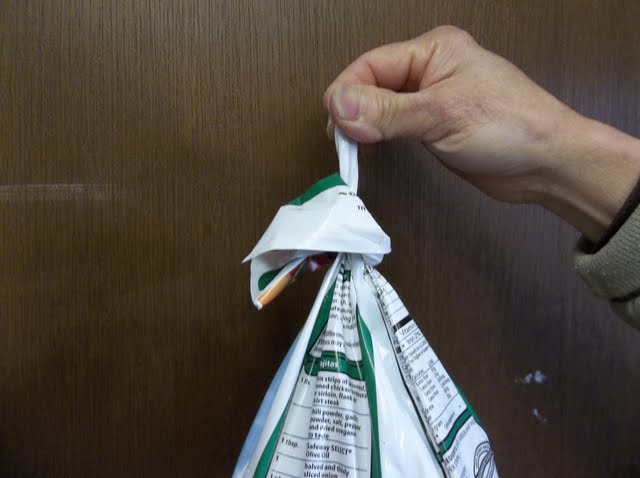
Now, take the tail and wrap it around the gather you just made . . . 


and tuck the tail under the wrap - kinda like tying a balloon.


You should now have a sealed bag that's ready to go back in the freezer for the next time you need it.


The bag closes well, it doesn't seal, but keeps things from going in and coming out. This works great for other bagged foods as well. As long as the bag is soft and pliable, you can do this trick. This will save you from finding a container or plastic bag for storage. 

Happy Tying!!


Comments or questions are always welcomed. I would love to hear what you think of this tip or any of my other posts. Thanks!

Friday, January 27, 2012

Templates for Cutting Out Paper Designs

Crafting with paper can be fun. Especially with the hundreds of scrapbooking paper available today, you can be sure to find a design you’re looking for. Sometimes tho, you may just want a small section of a large sheet. It can be difficult to select a design from a larger sheet if the sheet is filled with different patterns. I have devised a tool you can make yourself to help you in selecting that perfect design for your project.


Here is a 12 x 12 sheet of scrapbook paper. I would like to take one of those flowers to use in my design, but with all the other colors and patterns surrounding the flower, it's hard for me to see how the flower alone would look in my design.   


Here is my tool - basically the same shape as your base cut out of card stock, but 1/8" - 1/4" larger.


Here is my base: a 2" circle cut out from a formica chip sample.

Making this tool is easy. To cut out a circle, I have a Martha-Stewart Simple Circle Cutter or you can just find a circular shape that's a little larger than your base. Cut out your shape, leaving a boarder of at least 1/2" or so - you want to have a large enough border to break the large pattern on the paper and make it easier for you to see your design. I always mark my template as to what size it is, mine is 2 1/4".


 Now you can use your tool to isolate designs on large papers. Place your tool over your design and if you like what you see.


Trace around your shape. 


Cut out with a craft knife.


To center your design, coat the back of your design with glue, then hold your design against your base and hold up to a window or use a light box to see exactly where you want to place your design. Because the glue is still wet, you can shift the design into place. Cut the edges to the shape and finished as desired.


Here is another tool I've used time and time again. 


This also works with fabric - this is a hand dyed bookmark. 


This can also work with rubber stamping or other any craft where you need to see how a design would look on a particular base. So you see, you can cut out any design from a large piece of paper using my home made tool.

Happy Cutting!!!

Comments or questions are always welcomed. I would love to hear what you think of this tip or any of my other posts. Thanks!


Wednesday, December 7, 2011

Sanitizing Your Kitchen Sponges

We all have some kind of sponge that we use to hand wash our dishes or to clean messes. After a while they get real gungy, and in my case, very stinky. I've always hated that after just a few uses of my sponges, that they get stinky - especially my meat sponge (the blue ones in the pic). I use my meat sponge to clean anything that comes in contact with raw meat (I even have a separate cutting board and knife for raw meat - you should too). My regular sponge (the white/yellow one) will often get gross and eventually need replacing.

If you don't fully squeeze out all the water in your sponges and just let them sit, they will get gungy and start to stink (I do that when I'm in a hurry). I have been getting tired of having to replace my sponges all the time - they aren't very costly, but still.

I recently read on the Internet about sanitizing your kitchen sponges using dishwasher cleaner - it has bleach in it, which makes the perfect sanitizer. There were no specific instructions, so I made up my own.

You will need:  your dirty sponges, a flat glass (or ceramic) container to fit all your sponges, and some dishwashing soap (rubber gloves if you are sensitive to bleach).


If your sponges are dry, get them wet and wring them out.


Put about 2 tablespoons of dishwashing soap into your flat glass container. Add about 1/2" - 3/4" of water and mix the soap into the water - wearing rubber gloves if you need to.


Place your sponges into the container, pressing to get some of the soap into the sponges.


Set your timer for 10 minutes.


After 10 minutes, turn sponges over and press to get the soapy solution all through the sponges.


Set your timer for another 10 minutes.

After that, rinse your sponges thoroughly and let them dry. Put your glass container into the dishwasher for the next run.

This is my second time doing this and I love it! No more gungy, stinky sponges. Some of the stains will still be there (because they're stains), but it won't be gungy - I promise. I plan to do this every 1-2 weeks depending on how my sponges look (and smell). So if you have gungy/stinky kitchen sponges, take a tip from me and sanitize them quickly and easily.


Happy Cleaning!!!


Comments or questions are always welcomed. I would love to hear what you think of this tip or any of my other posts. Thanks!
                    

Sunday, November 20, 2011

How to make Almond or Rice Flour in a Coffee Grinder


Making your own flour is cheap and it's easy. I've been making mine in a coffee grinder because I don't have a Vita Mix or a good food processor, which is what is typically used. My coffee grinder is not big so I have to process in several batches - this is no big deal, once I get going, it gets done quickly. Coffee grinders are often sold cheaply at thrift stores (that's where I bought mine), if you buy one from there, clean it real well. If you wash it with soap and water, dry it upside down on a rack so water won't get in the motor and there won't be any chance of electrocution. 

You will need: a coffee grinder (one that will never grind coffee again)
                     slivered almonds
                     2 medium sized bowls
                     fine mesh sieve
                     large zip top baggie


It's best to buy your ingredients in bulk as this will save you money. For the almond flour, it's best to use blanched (skins removed) almonds. You could buy whole, raw almonds and put them in boiling water for about a minute then squeeze the nut between your finger to remove the skins, BUT I found slivered almonds in the bulk section, already blanched, and it cost only 10 cents more than the whole almonds. Regular almond flour is pretty pricey (I paid $11 for a 16 oz. bag! It was my first time using it). For 10 ounces of almonds, I got just over 3 cups of flour.


 Put about a handful of almonds in your grinder and pulse about 15 times. 


Next, you may need to pick up your grinder and shake or bang with your hand it to loosen some clumping (I use my thumb or finger to remove any flour that has stuck to the inside of the grinder) then dump it into a sieve that's over a bowl and shake the flour into the bowl - what you want is a very fine meal. 


You will have some small chunks leftover which can get re-grinded or eaten - I keep processing the chunks until there's less than a tablespoon left. 


Pour the newly processed almond flour into a large zip top baggie and use as desired. Store your almond flour in the freezer for best results, in fact, all nuts should be store in the freezer.

I use both bowls for processing and holding the flour.

For grinding rice flour, just buy yourself some brown rice (white is ok too, but you know that brown is better for you) and process it as you would like the blanched almonds. In the end, I had some pieces that were the size of quinoa and I just left it, after baking those made my bread crunchier.

Both almond and rice flours are great substitutions for making gluten free foods. They can be used together or individually. There are tons of recipes on the Internet that use both of these flours - do a search and see what delicious recipes come up. Although it takes a little bit of work, making your own almond and rice flour is easy, gratifying, and very economical.

Happy Grinding!!

Comments or questions are always welcomed. I would love to hear what you think of this tutorial or any of my other posts. Thanks!


Sunday, September 18, 2011

Jo-Ann Fabrics Coupons

Jo-Ann Fabrics is a fabric/craft store that's in 47 states in the U.S (tho, I did see a couple of links to stores in Toronto and Ontario, Canada - maybe our Canadian friends can verify). The racks are always loaded with merchandise and they are always having sales - themed sales, instore sales, and they offer numerous coupons to use on purchases. You can sign up at the store (at the register) to receive their mail flyer that tells you of storewide items for sale and will have coupons you can use. There really is no reason to buy anything at regular price at Jo-Ann's when coupons and sales are always available. Usually when you walk in the door of any store, there will be a bunch of instore flyers that advertise current sales and will always have at least 1 or 2 coupons. If you sign up online at Jo-Anns, there are even more items that are available for sale, some that are not in the stores - I've gotten some really great bargains on my craft supplies buying them online (shipping is pretty reasonable). As an online registered customer, you will get weekly emails notifying you of sales and will alway include a coupon.

Most recently, I received a coupon for 20% off my ENTIRE purchase (I've received several of those recently), which includes purchase of sale items. I used it yesterday to buy fabrics, plus I bought the new Quilting Arts Gift magazine which sells for $14.99. The magazines at Jo-Ann's were 10% off regular price and with the 20% off coupon, the magazine cost me $10.49 - not too bad. Update: Jo-anns sadly discontinued the discount for magazines - you have to pay full price for them.

I found out recently that as long as you use coupons from different flyers, there's no limit to how many coupons you can use. Yesterday I used my 20% off (entire purchase) coupon from online, plus my 40% off (1 regular priced item) coupon from my mail flyer, AND a 40% off instore coupon (1 regular priced item) - and from a purchase of $63, I saved $22.44. I think I made good use of all my coupons.

So, if you live near a Jo-Ann's, take advantage of their coupons, whether online or instore and start saving money so you can buy more supplies.

If you don't have a Jo-Anns near buy, see if your local fabric store has coupons and take advantage of that.


 Part of the Email coupon I got - there is a bottom section which
will have your name and a bar code.


Happy shopping!!


Monday, August 29, 2011

Protecting Your Kitchen Knives

Protecting the blade of your kitchen knives will prolong their life. You spend good money on them, so why not keep them around for as long as they will last. By protecting the blades, you sharpen them less and if you store them in a drawer, they don't cut you as you reach for them.

How do you store your knives? There are several ways they can be stored. A lot of knife sets come in a knife block - it's a block of wood that has individual slots for knives to go in, they are kept safe from other blades and there's no danger of anyone getting cut. There's also wall magnets - a very strong strip of magnet that's usually stuck to the back of your kitchen wall. You place your knives on this magnet, and they stay put till you need them. They could also be stored  in a drawer, but unless the blades are covered, there is a danger of getting cut when you reach for them, and the blades can get dull from banging around each other.

I don't have much counter space, so I can't have a knife block and a magnet wouldn't work for me because I'm short and can't reach the back of the wall. Let me show you how I protect my knives that are stored in a drawer.

Almost all good quality knives come with a protective cover. I keep those and use them to protect the blades and my hands. Some of my knives either didn't come with a cover or the cover broke from use, so I make my own and you can make some for you too.

Before I show you how to make a cover for your knives, I think it is important to know the different parts of your knife  - this will help with my explanation.

All you need is thin cardboard - cardstock will do or an empty cereal box. You'll also need some glue, double stick tape or even clear packing tape will do.

Make sure the cardboard is as wide as the blade on your knife and tall enough to fold twice around the end of the bolster, plus you add about a 1/2" for your seam. You will be placing the printed side of the cardboard up so when you are done, you will have an unprinted cover, not one with cereal print on it. Here's how I do it:

Place your knife so the end of the bolster is at a straight edge of your cardboard, if your edge is not straight, use a ruler and an exacto knife or razor to cut one. Place a tic mark at the top edge of your knife - you are covering just the blade, the tang and heel do not need protection.


Flip the knife over, placing another tic mark at the top edge and measure 1/2" from that and that is where you will cut.


Make even marks on the other side of the cardboard for each tic mark and using your ruler or edge of the table, create your folds for your sheath - I drew a line so you can see where I folded.


Using your ruler, a pen or something flat, crease all your folds.


Now take some glue or double stick tape and glue down the 1/2" seam. If you like, take a pen and you can identify which knife you just covered.

Now we are going to custom fit the cover to the knife.

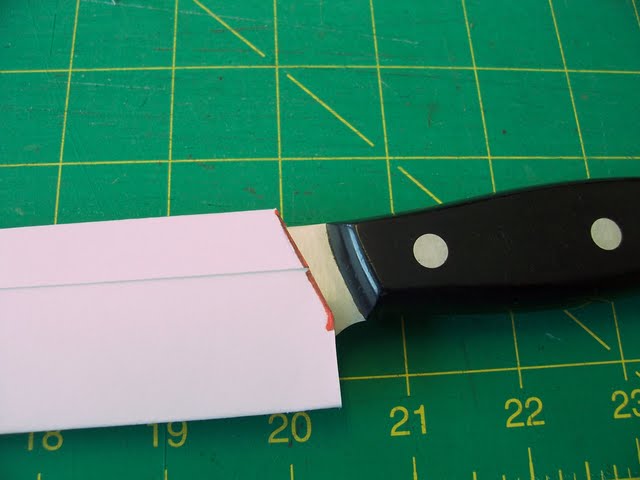
This is what it looks like when you are done. Doesn't look that great, but we are going to fix that.


Place your knife on top of the cover and hold so you can make a tic mark where the bolster meets the handle.


Following the angle of the bolster, cut that corner off, you can curve it if yours has a curve (just eyeball it). By cutting that corner, the cover tends to fit better and there's less chance of it coming off. You're done!!


One more important thing about knives -

 I think it is critical to have a designated knife for cutting raw meats to prevent contamination, so I mark mine with a sharpie so everyone in the family knows (I also have a seperate cutting board for cutting meat and sponge for washing items used to cut raw meat).


So there you go, now all of your knives will always be sharp and ready to use by being protected with their own custom covers.


Some well used knives.

Thanks for reading!!