Tuesday, July 10, 2012

Preserving Your Acrylic Ruler

Many crafters have their favorite tools that they use all the time. One of mine is an acrylic ruler, I like this one by Omnigrid - it has measurements down to 1/8", which I use in both sewing and paper crafting. It is because of this 3" wide ruler that I have been able to finally get a grasp on working with fractions (my algebra teacher would be so proud - lol!).


Because I've had this ruler for years and used it all the time, the numbers and lines on the backside (the side that is always on top of the fabric) have worn off (it's only painted on) and the first several 1/8" measurements are gone, which makes it difficult to use.


A while ago, I did buy a new, identical ruler (because I liked this one so much) and I have decided that I want to preserve this ruler so it will last a while, my first ruler has lasted more than 4 years or so. As I was planning to preserve the new ruler, my first ruler broke around the 13" mark, so I cut it off and sanded the edge smooth. 


I took the new ruler and placed the worn ruler face down on top of it - basically, they are face to face. With the new ruler on the bottom, I can see the 1/8" measurement lines and using a sharpie, trace those missing lines.


See the newly drawn lines? (I didn't say they were straight)


Now, to preserve those newly drawn lines and to preserve your new ruler - take some clear packing tape and using the 1 1/2" horizontal measurement line as your guide (half of the ruler), place the edge of your tape on that 1 1/2" line and do the same for the other side - doing it in the center will avoid having a tape line where you don't want it, and will be unnoticeable. There will be an overhang on each side which you can cut off with a craft knife or scissors. You can do this with any size ruler - for the real narrow ones, just use a single piece of tape and place ruler in the center of tape .


Here, the packing tape was placed off center, I figured out how to center the tape after I stuck it on the ruler so if you look close, you can see the tape at the 1-1/4" line from the left side.

My worn out ruler is now back in business and my new ruler is ready for a lot of cutting and measuring. My new ruler should last me a long time - plus, with the tape on the backside, if it should ever crack, it won't separate because of already being taped. How cool is that?

So if the lines on your ruler get worn out, use my simple tips to get it back in action again and if when you should buy a new one, be sure to tape up the back so you can preserve it for many uses.

Happy Cutting!!!

Comments or questions are always welcomed. I would love to hear what you think of this tip or any of my other posts. Thanks!


Friday, June 22, 2012

My New Camera and Case

 This is my new camera I got recently. It's a little smaller than other cameras I've had. It needed a camera case so I decided to sew one.


It's nothing fancy, but I did use soft material for the lining and I quilted it. I dyed the velcro to match the lining (I should've dyed the part on the body gray or used black to match the fabric). I bet you're curious about the hole in the strap huh? Well, we'll get to that in a little bit. 


See how small the camera is? Oh, don't worry about that card and the info on it - it's a bogus card.


Side-by-side comparison.


Ok, let's get to that mysterious hole in the strap. My camera has the strap attachment thingy in the center of the side and with the strap closed, the strap wouldn't close right. So I decided to put a HUGE button hole where the strap attaches to the camera so that would not be an issue. The hole is big enough for the middle of the strap to go thru. Pretty cool huh?


And speaking of the strap - I have an issue with it. Especially for digital cameras, most straps look like the one in this  pic. See the thin wimpy end at the bottom? Well, I know it's supposed to be strong, but I've always hated it. I've always thought that it looks very disproportionate to the camera, and to me, it doesn't feel right when I carry it. 


So, I took 3 strands of some strong fishing line and braided it, used some black automotive shrink tube where the red is (the red is the same lining fabric), and I attached a wider fabric piece in the middle for better grip.


  So here is my new tricked out camera and its protective case. What do you think?


Thanks for reading!!


Comments or questions are always welcomed. I would love to hear what you think of this post or any of my other posts. Thanks!

Thursday, June 14, 2012

Sesame Chicken Remake

Chinese food is very tasty, but can be expensive. Especially if you're gluten free (gf), like me, a lot of Chinese dishes are not compatible to our diets - they use real soy sauce that contains wheat and they coat a lot of fried foods in white flour, which we all know contains gluten. Well, I was recently watching Melissa d'Arabian on the Food Network and she made this wonderful Sesame Chicken recipe - it has soy sauce and flour in it. Well, I wanted to give this recipe a try and being gf, I figured out how I can enjoy this recipe without all the side effects that I can get from eating gluten.

I changed the soy sauce to wheat free tamari - it looks and tastes exactly like the real thing, you'll never know the difference. I also changed the flour to almond flour - you can find it online or at any natural food store, or you can grind it yourself. I did leave out the orange juice as citrus causes me to have a runny nose, I added some sesame oil for added flavor.

I used chicken thighs as I feel they are tastier and doesn't dry out like breasts do. I clean my chicken thighs - did you know the thighs have fat on them and there is a vein that I pull out, I don't like eating those extra things. Here is how I clean my thighs:

Here is a chicken thigh - sometimes it has stringy fat hanging off of it, I cut it off.


See that patch of fat where the tip of my knife is? I use the tip of my knife and scrap off that fat. Look for other patches of fat and scrape those off too.


Turn the thigh over. On one side there will be a pocket of fat, on the other will be the vein - you sometimes have to poke around to find it - here is the pocket of fat, scrape that off like you did before.


Here is the vein on the other side:


Get your fingers in there and pull it out.

It's as simple as that. You will get your hands dirty, but you'll be glad that you won't be eating all that extra junk.

Now on to the recipe:

I gather all my ingredients and have them ready to go.


The chicken is marinating in the wheat free tamari, sesame oil, wine, and red pepper flakes (I threw in the sesame seeds - they were supposed be mixed with the flour, but I forgot).


Prep a lipped cookie sheet - line with foil and place a cooling rack on top and spray generously with oil. 


After marinating the chicken - you bread it. You can either put it in a pie pan or 


You can use a zip top bag. This is what I used this time, but I like the pie pan method better.


Place chicken on your rack and spray with oil.


Turn over 1/2 way thru your cooking time.


This is what your chicken should look like. If you use the pie pan method, you get a better coating on the chicken. 


Sesame Chicken     (printable recipe)


6 pieces of boneless, skinless chicken thighs
2 tb. wheat free tamari
2 tb. sesame oil
1 tb. mirin (Japanese sweet rice wine) or white wine
1/2 tsp. crushed red pepper flakes
1/2 c. almond flour (can use any gf flour)
2 tb. sesame seeds
Spritz of spray olive oil


Preheat oven to 375 degrees. Line a lipped baking sheet with foil and place a cooling rack in it and spray with olive oil.


Cut the chicken thighs to 1 inch pieces. In a pie plate or bowl, mix the tamari, sesame oil, wine and red pepper flakes - marinade won't be much, just enough to flavor the chicken.


Place chicken pieces in your pie plate and marinade for at least 10 minutes or up to 8 hours - I did mine for 2 hours. Get your flour ready - place in a another pie pan and stir in your sesame seeds.


After marinating, place your chicken the flour mixture. If you use the bag method, just dump and shake. If you use the pie pan method, you can roll each piece to get coated (I like a lot of coating, so I ended up adding extra flour and seeds).


Place the coated chicken pieces on the prepared rack and spray liberally with oil.


Bake for 10 minutes, then turn over the chicken to finish for another 10 minutes. If you like your chicken extra crisp, like I do, turn your broiler on and broil for 3 minutes.


Serve with steamed rice or quinoa (my choice) and a side dish of your choice.


Happy Cooking!!

Comments or questions are always welcomed. I would love to hear what you think of this post or any of my other posts. Thanks!

Monday, April 9, 2012

Crafty Jim

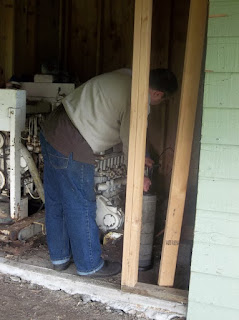
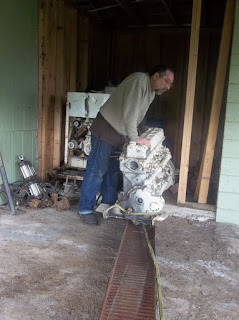
I'm not the only one that's crafty, Jim is crafty too, but his craftiness is on a larger scale - a much larger scale. He is an avid diesel engine fan. He has several of them and he likes to get them (free in this case), fix them up and either keep or sell them.  

Left - a huge generator, Right - a marine engine 


This is Gregory and Patricia. The engines were from Patricia's late husband, he was an avid boatman and they lived asea for 18 years. Patricia's late husband built a boat from scratch and had this generator and engine in it. Patricia's husband died suddenly and she was left with several large engines and this large generator. 

Several years ago, Jim worked at an auto mechanic shop 15 miles out of town and Patricia was one of the customers for the business. Patricia had these two 2,600 pound engines that she wanted to be rid of and this was right up Jim's alley and he took them - he hired a towing company to load them on his truck. Jim had his fun with these 2 engines and have since moved on to other projects.

Last week, Jim's former boss called leaving a message about this engine and generator that Patricia had - she had forgotten Jim's name, but remember where he worked so that's how the re-connection was made. We ended up going to look at these the day before Easter, to see if this was something Jim wanted to deal with. Turns out, the engine and generator were entombed in this shed, they literally built the shed around the engines and forgot about them for 14 years. Redoing the roof was what reminded Patricia and Gregory of these engines and they wanted them out. The front side of the shop had a sloping roof and the backside had trees - this was not going to be an easy task, but Jim and Patricia decided on doing it the next Saturday. As the day went on, Patricia and Jim were in phone contact and because of unsure weather, they decided to tackle this project the next day, Easter Sunday.  

On Sunday, we got there just before 10:30am in the morning and tackled the small engine. The plan was to drag it straight out, avoiding the posts holding up the sloping roof, and Jim would use the crane on his truck to pick up the engine and place it on his truck. There were also issues with a well and septic pipes, so it was a definite challenge.

Jim and Patricia discussing the best way to remove these engines.


This is the smaller one that was being dragged straight out.


There was oil in the pan, so Jim had to drain it to avoid any spillage.


Engine hooked up to chains, that post on the right was a slight problem. It was at this time that someone else needed to drive the truck so Jim could keep an eye on the engine. I can't drive it and Gregory has a bad back, so Patricia manned the steering wheel (she did an awesome job!).


Ok, cleared the post. 


See the sloping roof? That was a challenge for Jim, 
but between him and Patricia, they got that sucker out.


Oops - fall down!


Jim's getting everything hooked up to be craned onto the truck.


Here we go!


Almost there.


After some minor adjustments, it finally seated where Jim wanted it.


All tied up, it's not going anywhere. By this time, about an hour has passed - it's about 11:30am.


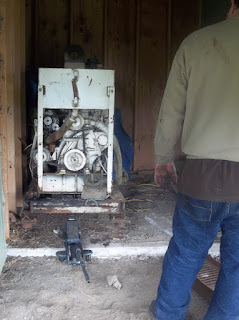
Ok, this big boy is next. The plan was to pull it out of the shed 
and pivot right, then pull it out thru the side.


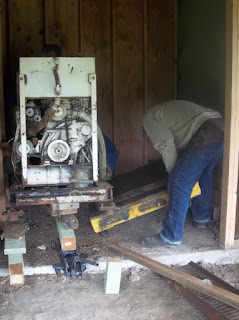
Throughout the entire process, Jim used a small jack and blocks of wood to get things stablized - it was just like moving a house. It was jack up - block, jack down - block over and over again, it was very tedious. Under the skid is a metal piece in each corner (like a shoe). Jim tried to remove it, but it wouldn't come off so it made things a lot tricker.


This heavy duty dolly was going to be placed under the generator so it could be pulled out. Not easy with the skid in the way. It took a lot jacking and blocking - we're lucky Patricia had all those blocks of wood and the plywood.


Not quite there, just a couple more inches.


Got it!


Getting ready to be pulled out.


Nice and easy. Patricia's behind that steering wheel again and 
Gregory is relaying Jim's instructions to her.


Plywood was laid down on top of the dirt. We all thought the dirt was hard, but it wasn't, the dolly sunk right in. The top of the generator managed to clear the beams of the sloping roof by a couple of inches.


Alright, it's out!


Positioning the car trailer so the generator could be pivoted and winched up.


More jacking and blocking.


Nice and easy. Now, I am manning the controls for the winch.


Getting the ramps situated properly.


It's coming along slow and easy.


Almost there.


Woo Hoo! We did it!!


Removing the dolly and tying down.


The shed is empty - waiting for new things to be stored in it.


View of the snow covered Olympics.
We were very lucky - the weather held out and was rather nice. 


The generator took about 2 hours to get seated on the trailer, it took a lot of jacking, blocking and winching to get it on the trailer. We finally broke for lunch around 1:30pm - Jim was beat. After the clean up, we got home around 3pm. Jim just parked everything, covered them up and came in to rest. 

The tentative plan is to see if these even work - if they work, he might pretty them up to put them in the county fair. Patricia is going to do a write up of these engines so people will know it's history.

It had been a very long and tiring day - it surely was not a lazy Easter Sunday for us, but Jim now has 2 new toys to play with.

Thanks for reading!! 

Comments or questions are always welcomed. I would love to hear what you think of this post or any of my other posts. Thanks!