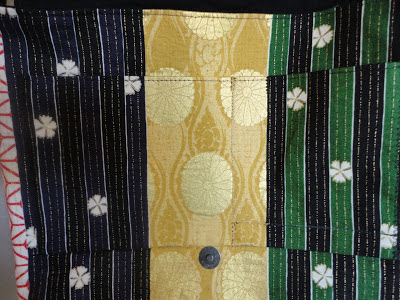
I think this fabric is gorgeous - it has rectangular panels of various Asian print, and the combo looks just great together. It was almost too nice to cut - the optimum word here is "almost".
I decided to make a messenger bag for me. For those who know me, I am only 4'7" tall and a regular messenger bag is HUGE on me. My only solution is to make my own and since I know how to sew bags, I decided to make one for myself, and this is what I made.
I basically used the same pattern to make this bag - I just had to design a flap that would match nicely.
See, when you make your own bags, you can customize it however you want - size, pockets, etc. I wanted pockets under the flap on the outside of the bag to hold my cell phone, a pen, and some smaller essentials. I used gold thread to separate the larger pocket on the left side from the pen pocket, and black thread to separate the pen pocket from the cell phone pocket on the right side. I wanted it to look seamless and have the pattern unbroken, so I matched the fabric exactly. This is what I came up with - can you see the pockets?
Maybe this view is better:
Note the magnet at the bottom - I used the thin part of the magnet because I didn't want much protrusion.
Here is the magnet for the flap - it's about 1/8" thick:
These are the inside pockets - I made 3. The larger one on the bottom is a full size pocket 8" x 12" - that one is for holding large papers or a magazine. The top pockets are the same size as the bottom except there is a seam down the center to create 2 pockets.
I could have just measured the bag and sewed on the webbing exactly to my measurements, but I wanted to make it look like a real messenger bag, so I made the straps adjustable. That way should I ever want to make the straps shorter, I have that option.
The other side I used the spacer to make it look decorative - I usually just sew the end into the top of the bag.
Here is one side view. When sewing with a fabric that has a large pattern, you can manipulate the pattern to take advantage of the fabric print - just watch how your pattern placement is on the fabric so you can benefit from the fabric design - check twice before you cut.
Here is the other side. By being strategic with my cuts, I was able to get the benefit of all the prints of this nice fabric.
Here is her back view (**note the top where the flap meets the bag).
Here's the bottom view. I may go back and put feet on the bottom so that it's not resting on a dirty floor. I might also make a false floor for the inside to prevent sagging. Haven't decided yet if I want to do all that.
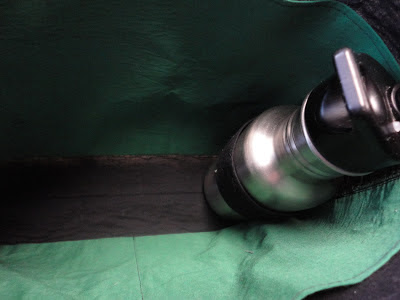
After completing the bag and marveling over it, I was thinking what if I want to carry my water bottle? It would probably fall so it would most likely be laying on its side and I didn't want the chance of water spilling, so I decided to sew in a 2" x 8" strip to the side. That meant taking bag apart - including ripping out the the zig zag stitches and top stitches so I could sew that small piece to the side!
It wasn't easy to take apart with the long straps.
So I undid everything and sewed the tab under the pocket on both sides.
This was all done the afternoon before I needed to take this bag with me to jury duty. I had a time crunch and was afraid I wasn't going to make it (I was also doing laundry too!). In my hurry, I ended up putting the lining in backwards - I wanted the magazine pocket to be in the back, but I put it in front, it does affect how it closes, but not by much.
She did get completed that afternoon and took her to jury duty and she performed very well. The only down side was that I didn't take my water bottle, it was stupid actually. With a magazine and other necessities the water bottle made it very tight and I couldn't secure the flap with the magnet, so I took the water bottle, but left it in the car - should've just carried it, but oh well.
Some negative points about the bag:
- **If you look closely at where the flap meets the bag, you can see that I messed up and didn't get the match the strips color wise - that's ok, it still looks good.
- Next time, I will make the flap longer so it can close securely when really full.
- I might also make the bottom wider so it can accommodate a water bottle or other bulky items.
These are very minor and do not affect the performance of this bag at all. It's just stuff that I would do better next time - no one would notice these issues unless I pointed them out. Overall tho, I am very pleased.
Here she is all all complete - how do we look?
If I decide to put feet on her, I'll come back and show you what it looks like - also if I make a false floor. Anyways, that's my new messenger bag. Let me know what you think.
Thanks for reading!!
Comments or questions are always welcomed. I would love to
hear what you think of this post or any of my other posts. Thanks!


No comments:
Post a Comment